Showing posts with label Tutorial. Show all posts

Sunday, November 13, 2011

To Infinity and Beyond.......

Ok, so there is no beyond, but I have made a couple of Infinity scarfs.

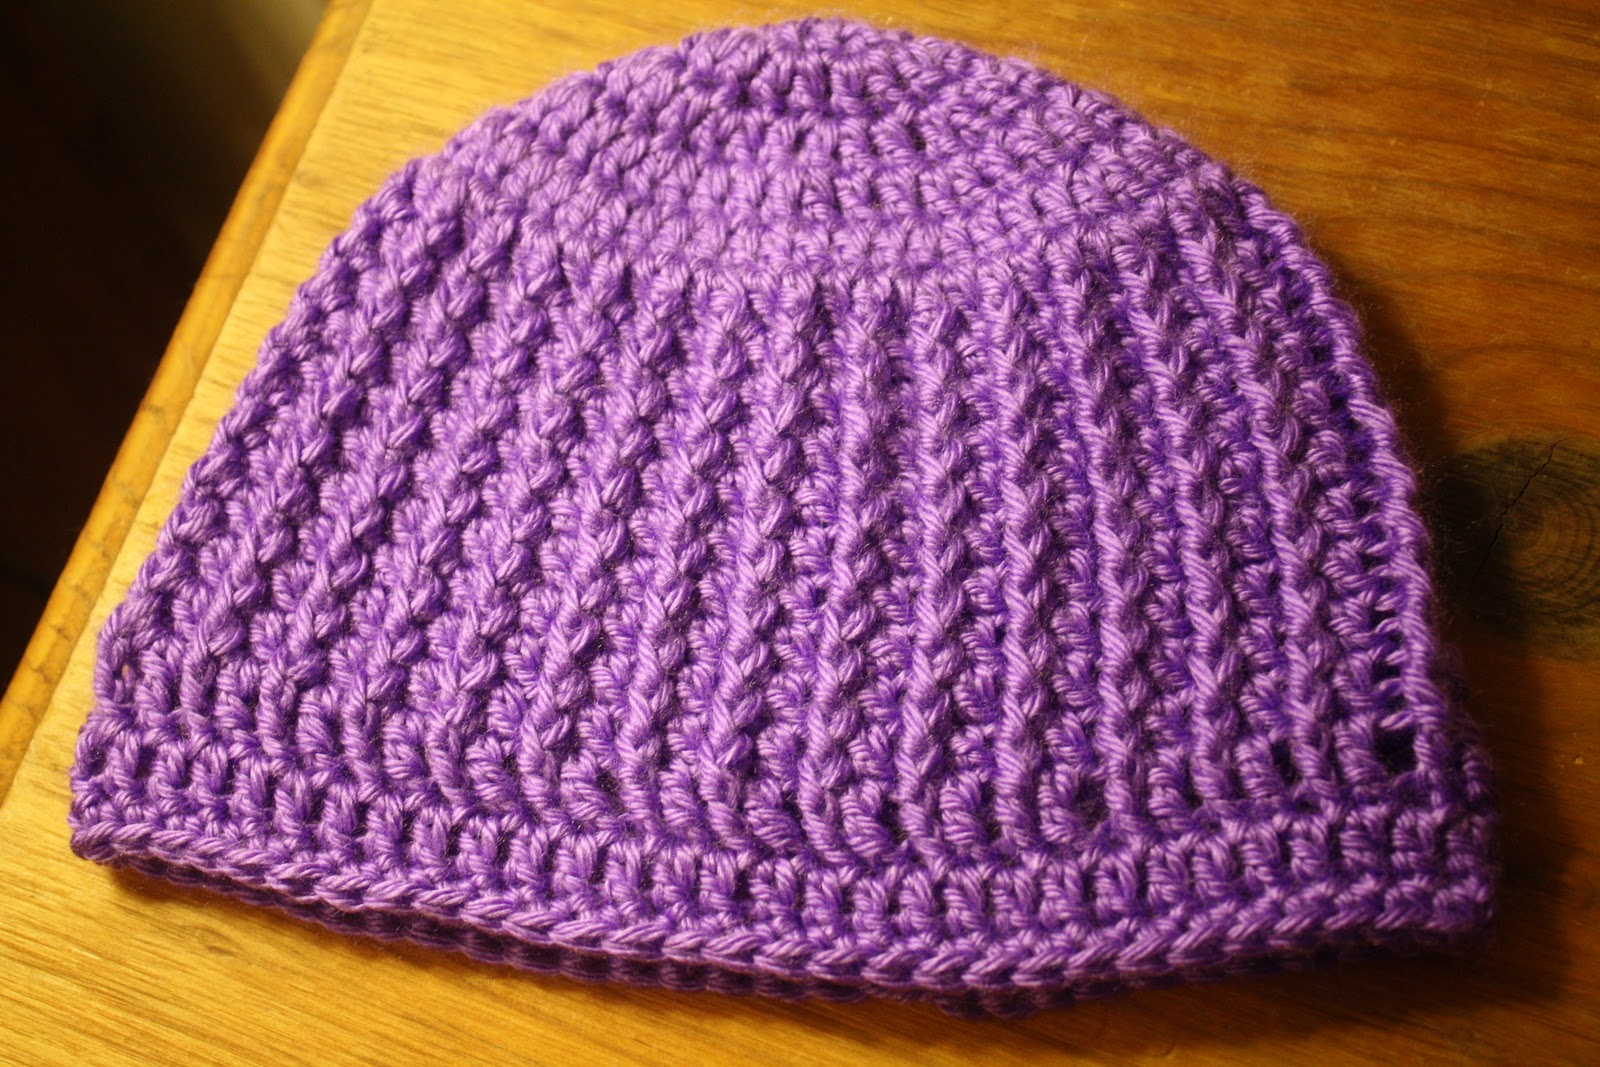
This little one was made using one skein of Vanna's Choice in Mustard. The pattern I used was Caron's Bellflower Infinity Scarf.  I needed another skein to make it long and able to loop around, but I didn't have one so a short one it is. It's very warm and would have probably been too thick looped around anyway. Has anyone else noticed that Mustard is a popular color right now?


Now for my second one. I made this one in about 4 hours on Friday. The yarn I used is Lion Brands Tweed Stripes in color 206 Woodlands. LOVE this colorway! This was my first time using a self striping yarn and will definitely use it again.  

I started out similar to the patter for the Mustard scarf, and changed up the shells a little. 
Here's how I did it.
-2 skeins of Lion Brand Tweed Stripes
-H hook

Start with a chain of 34.
ROW 1-
DC in the 4th chain from the hook.
*Skip next two ch's.
2 dc, ch 1, 2 dc in the next ch.
dc in each of the next two ch's.*
Repeat from * to the end. Ending with dc's in last two ch's.
You should have 4 shell clusters and 5 two dc spaces.


ROW 2-
ch 3 and turn, dc in next dc.
*in ch 1 space of shell- dc, ch 2, dc
skip to 2 dc's and dc in each.
repeat from * to the end with a dc in the last dc and a dc in the top of the ch 3.

ROW 3-
ch 3 and turn, dc in the next dc.
*in ch 2 space of shell-2 dc, ch1, 2 dc
skip to 2 dc's and dc in each.
repeat from * to end with a dc in the last dc and a dc in the top of ch 3.


Repeat rows 2 and 3 until you reach the desired length. You could leave this as a scarf or sew the two ends together to make a Mobius or Infinity scarf.  I hope I explained the instructions well enough, but if not please feel free to leave me a message.

I have dinner simmering away in the Crock Pot, Beef Tips and Gravy. Pammy Sue at Scotty's Place posted the recipe a while back. This is always a hit with my family. Basically you just add a package of beef tips, (I use the large pack, got a lot of mouths to feed here) and 2 cans of Beef Gravy. Throw it in a crock pot on high for 4 hours. I am going to cook some egg noodles and add them to it. Perfect for a chilly day. I am gonna go now and make a Butter Pecan Pound Cake. If you would like the recipe let me know, I will be glad to share.

TTYS!

Saturday, June 11, 2011

New baby blanket in the works

This is the start of a new baby blanket I am making for my cousin Jennifer's first baby.
Braxton is due to make his appearance in August.

I have been looking for a pattern I liked and could not find one. I know she has many patterns in the nursery, baby blue and brown diamonds, stripes, and paisley with circles. I started making diamonds and sewing them together but was just not happy with them. I decided to do a granny stripe but added single crochet in between the color changes.

Here's how I did it:
Started with a chain of 120.

SC for 3 rows.
Granny stripe for 6 rows.
SC for 3 rows. Change color.

SC for 3 rows.
Granny stripe for 3 rows.
SC for 3 row. Change color.

repeat

I will finish the other end in the baby blue I started with, with the 3 rows of SC, 6 rows of Granny stripe and 3 rows of SC.
I love how it is turning out, and of course I am using I Love This Yarn! The colors are #70 Soft Blue and #160 Brown.

I have been looking at these hooks for a while now and finally gave in a got a couple of them. I got a H hook and a G hook. Oh My! You would not believe the difference these hooks have made with my hands. I can crochet longer without my hands getting achy. I have been doing some Amigurumi lately for my Pre-K class and a G hook makes my hand hurt after using it a long time. Not now! I will be going back and getting all sizes in these.

Look what my child came running up with last weekend. A little Mockingbird fell out of its nest and of course she found it. This child will pick up any kind of bug, insect, and animal. I have found Granddaddy Long Legs, Lady Bugs, Lightening Bugs (fireflies to people who are not from the south! :-}), and most recently 2 bull frogs and a tree frog in the house recently.

She ran inside and got a bowl for it, and was even digging in the yard looking for worms to feed it. Ugly little thing ain't it! I made her put it back and we have been watching out for it making sure the Mama bird is feeding it.

WARNING! DIRTY CHILDREN AHEAD!!


What could be better after a long afternoon playing outside than a nice slice of cold watermelon? We spent pretty much all afternoon outside playing so they were sweaty, sticky, dirty, and very happy! 

I have been listening to a few rumbles of thunder while typing this up, so its time to grab a cup of coffee and head to the porch to watch a storm blow in. I love thunderstorms, and can always be caught on the porch during one with my camera ready to try to catch a photo of lightening. Crazy? Yeah I know but I love it so much. Hope your having a great weekend where you are.
TTYS! 


Friday, January 7, 2011

Tutorial for the Hat with a Bow


 This hat is one I just came up with off the top of my head.
 Ha! Hat~Top of my Head!
OK that's enough of that.
 I made the hat for my oldest daughter to wear on a field trip. I got a lot of compliments on the hat, and have even sold 3 so far. Alright then,  lets get to it.

Materials needed:
Size H crochet hook
About half of a skein of yarn. I used Caron Simply Soft for all the ones I have made.
Needle
7/8" ribbon

Stitches Used:
Double Crochet
Triple Crochet
Slip Stitch


Start off by chaining 2.
1. 10 dc in the second chain from the hook. Join with a sl st to the first dc. (10dc)


2. Ch 3, (counts as 1dc now and throughout) dc in the same space as join, 2dc in each st. Join with a sl st to top of ch 3 (20dc)


3. Ch 3, dc in the same space as join *1dc in the next st, 2 dc in the next* repeat from * Join with a sl st to top of ch 3 (30dc)

4. Ch 3, dc in the same space as join *1dc in the next 2 stitches, 2dc in the next* repeat from * Join with a sl st to top of ch 3 (40 dc)

5. Ch 3, dc in the same space as join *1dc in the next 3 stitches, 2 dc in the next* repeat from* Join with a sl st to the top of ch 3 (50 dc)

6. Ch 3, dc in the same space as join *1dc in the next 4 stitches, 2 dc in the next* repeat from* Join with a sl st to the top of ch 3 (60 dc)

Now is when you will start the FPDC:
7. Ch 3 *FPDC around the next stitch, dc in the next stitch* repeat from * Join with a sl st to the top of ch 3

Repeat row 7 until the hat reaches just past the top of the ears.
My hat worked out to 10 rows of the post stitching rows for 3 year old, 12 rows for a 5 year old.
8. Ch 4,* FPTC around the next stitch, TC in the next stitch* repeat from * Join with a sl st to the top of ch 4. This is the row that you will weave the ribbon through, and the last row to use post stitches.


9. Ch 3, dc IN each st join with a sl st to the top of ch 3.

10. Ch 1, sc in each stitch around, join to ch 1.  Finish off and weave in the end.


Now is the time to add the ribbon. I just wove the ribbon under the FPTC's, then tied a cute bow.

I have an idea of a way to sew a bow to the ribbon, and using Velcro as a closing. This way it would be easier to change out the ribbon or to take it out when washing the hat. I just need to get out needles and thread and work on it. I will let you know if I get it figured out the way I want.

This hat can be made smaller or larger by adjusting the hook used, or by adding or subtracting the number of increase rows.

If you have any problems or if the stitches don't work out right for you, please, let me know. This is my first time writing up a pattern and I hope my directions are clear.